|
||||||||||||||
| Welcome
|
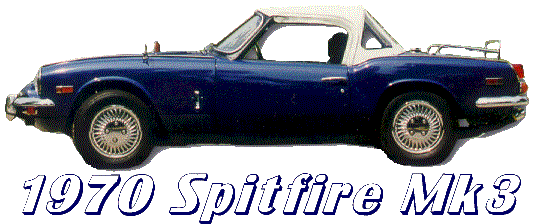
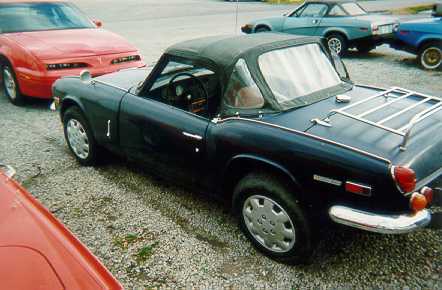
WelcomeThis page discusses the development of my 1970 Spitfire MkIII. After the wreck of my 74 Spitfire 1500, I decided to replace rather than rebuild. After a few months of searching I found a rebuild candidate on the VTR Classified website. I am assembling this website to provide information on How I went about assembling the vehicle and lessons I have learned along the was. Based on past experience, I will only be updating this site on a monthly basis. Check back in a few weeks for further updates on the project.
PurchaseI purchased this Spitfire from TS Imported Automotive in Pandora, OH. I discovered it at first during a trip to Pandora with my local Triumph car club, the Detroit Triumph Sportscar Club. I also found it in the VTR Classified as stated above. After inspecting the vehicle, Ted Schumacher offered two different prices, $1100 complete or $500 w/o the engine. I opted to take the vehicle without the engine as I can still use the recently rebuilt 1500 engine from the wrecked vehicle.
The RebuildThe current plan to rebuild the 70 Spitfire follows my philosophy on rebuilding cars. I have decided to pass on the "Frame Off" restoration and concentrate on getting the vehicle as reliable as possible.
Differential ReplacementThe differential on this vehicle failed prior to my purchase (I believe that this is the main reason for selling the car). The differential would not allow the rear axle to rotate, almost as if the ring gear was cracked or the differential severely contaminated (with rocks). The main task here was to remove the differential. On the surface this is not an easy task, but not insurmountable. The diff. is held in by two vertical bushed mounts in the front, each with their own mounting stud on the frame and two horizontal bushings in the rear held in with a single long bolt. The top of the differential is mounted to the rear spring with 6 bolts and is accessed through a access hole in the body behind the rear cockpit panel. After removing the bolts which connect the axle shafts and prop shaft to the diff. I removed the two front mounting nuts without any problems. When I attempted to remove the rear (long) bolt, I ran into a problem. After removing the nut from the long bolt, the bolt did not want to come out. The bolt was rusted to the stand-off (distance pieces) inside the rubber bushings. When I tried to spin the bolt, the rubber bushing would "wind up" allowing the bolt to turn only about 90 deg. After several hours of trial and error, I decided to just spin the bolt free, regardless of the windup. After placing a large "cheater bar" on the end of the ratchet, I rotated the bolt until the rubber failed allowing the bolt to spin but the standoffs were still rusted to the bolt preventing its removal. Now I am desperate. After thinking about it overnight, I decided to cut the bolt using my Milwaukee Super SawzAll. After raising the vehicle enough to make room for the saw body, I cut the bolt in 4 places and removed the differential. It took about 15 minutes. No damage to the frame or to the differential case. After removing the differential, I decided to open it up and inspect it. Upon removal, I noticed excessive oil around the diff and broken spring mounting studs (only 2 studs were holding the road spring). Upon opening the case, there was no oil left in the case. The case was filled with shavings from the pinion and ring gear. There was more oil residue on the outside of the diff than on the inside. I had a 1500 rear diff (3.89:1 ratio) to replace this 4:11 differential. It came as a spare for the 1500 I purchased last spring. After cleaning it and installing it into the vehicle, I noticed that the companion flanges for the rear axles and prop shaft are not the same. the Companion flanges for the MK1-III use a smaller mounting hole diameter than the 1500. To resolve this concern I have purchased new U-joints and I have all the mating companion flanges for the 1500 propshafts and axle shafts which I will use to mate this 1500 differential to the MkIII driveline.
|
|||||||||||||
|
||||||||||||||


![[Back One Site]](../../images/ringbkwreath.gif)
![[Fwd one site]](../../images/ringfwwreath.gif)