|
|
Patrick Barber's 74 SPITFIRE
1500
|
|||||||||||||||||||||
Inspiration
|
InspirationEvery project needs some type of inspiration. Some type of trigger or spark to get start the mind reeling with thought and ideas. My inspiration for this project came from the previous owner of my current home. The previous owner left behind a Spitfire hood (bonnet) which he no longer needed or wanted. I didn't pay much attention to it as much as I thought of ways to sell it or obtain some other type of financial gain from it.
InvestigationIt was this bonnet however which did inspire me to further pursue the spitfire as a project vehicle. Investigation in the the Trading Times (newsprint edition) led me to find several Spitfire project car posibilities. Most of the vehicles advertised were outside my price range (over $2000). I was happy to see that several of these were under $2k and this is wen I really became serious about the purchase. I found several vehicles which fell into the catagory of "a fixer upper" and one which was listed as a 75 Spitfire, 95% restored, $1800 o.b.o. Must sell.... Of course as soon as you see this you know that it has already been picked up, and of course it was. I happend across a Spitfire ad in the "Kit Car" section. Apparently this vehicle was in some unknown state of being rebuilt. I contacted the owner and discussed the condition of the car. I really wanted to take a look at it. I was somewhat nervous about the condition of the vehicle, but I made arrangements to see it. When I arrived the vehice was completely disassembled. The body was off the frame, the engine was a block which was stripped bear. The owner had so many parts I couldn't believe it. Close inspection of the critical portions of the vehicle revieled that the frame was in excellent condition. It had been shot blast and primed. The block had been hot dipped and magni-fluxed (to check for cracks) and was ready for rebuild.
Purchase
The RebuildThe rebuild was planned in several stages with one main goal in mind, get the car back on the road by July 4, 98. I purhcased this car in March 98 which only gave me about 4 months to complete the task. The first stage was to literially get the nuts and bolts in order. I needed to catagorize and store all the nuts and bolts so I could find them easier when I needed them. The project had 4 main tasks, Rebuild the chassis, rebuild the engine, prep the body and assemble the previous 3 results.
Rebuild the ChassisRebuilding the chassis was the first step. When I purchased the car the frame was already cleaned, shot blast and primed. All I needed to do was paint it. I wasn't too concerned about what paint to use, nor was I concerned about what paint method to use. The frame was primed with a brown rusty metal primer. I decided to paint the frame with a brush using Rust-o-leum (Gasp!) gloss black paint. Lessons Learned (Frame Painting):
I painted the rest of the chassis Rust-o-leum black as well. Including:
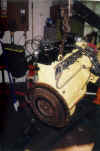
Rebuild the EngineRebuilding the engine
This area is still under development. Please review the pictures. If you have any questions please drop me a note at patbarber@geocities.com
The Refinement
This area is still under development. Please review the pictures. If you have any questions please drop me a note at patbarber@geocities.com
1998 VTR Convention
This area is still under development. Please review the pictures. If you have any questions please drop me a note at patbarber@geocities.com
The Wreck
This area is still under development. Please review the pictures. If you have any questions please drop me a note at patbarber@geocities.com
Picking up the pieces
This area is still under development. Please review the pictures. If you have any questions please drop me a note at patbarber@geocities.com
|
|||||||||||||||||||||
|
||||||||||||||||||||||


![[Back One Site]](../../images/ringbkwreath.gif)
![[Fwd one site]](../../images/ringfwwreath.gif)